Feeds:
Posts
Comments

Archive for the ‘Recipes’ Category

Banana Walnut Granola

Banana Walnut Granola

I’ve made a few variations of this USA Weekend granola recipe ever since discovering it, and this is my most recent favorite.  It’s perfect with cold milk and fresh blueberries.  You might read through the ingredients and think, “One tablespoon of vanilla? Is that a typo?”  but trust me:  an absurd-seeming amount of vanilla extract is the secret to awesome homemade granola.  The imitation stuff is probably fine, and if you’re a Costco member they carry large inexpensive bottles of real vanilla extract.

Banana Walnut Granola

Banana Walnut Granola

Adapted from USA Weekend

2 cups old-fashioned oats
1/2 cup wheat germ
2 Tbs. brown sugar
1/4 tsp. salt
1/3 cup sweetened shredded coconut
1/3 cup chopped walnuts
1/2 cup chopped banana chips
1/4 cup maple syrup
2 Tbs. canola or other flavorless oil
1 Tbs. water
1 Tbs. vanilla extract
1/2 tsp. cinnamon

Preheat the oven to 275 degrees, and spray a 9×13 metal baking pan with cooking spray.  Mix the oats, wheat germ, brown sugar, salt, coconut, walnuts and banana chips in a bowl.  Combine the maple syrup, oil, water, vanilla extract and cinnamon in a small saucepan and heat over medium heat until simmering.

Drizzle the hot liquid over the dry ingredients and stir to combine.  Spread the mixture onto the baking pan, and squeeze it to form small clumps.  The wheat germ mixed with the hot liquid forms a kind of mortar and helps make those great crunchy clusters that are otherwise hard to get with homemade granola.

Bake at 275 for 35-40 minutes until light golden brown, stirring once or twice.  The granola may not be as crispy as you would want it right away, but it will get crispier as it cools.  Let cool and store in an airtight container for up to 2 weeks.

Read Full Post »

Festive patriotic cake

Tastes like freedom

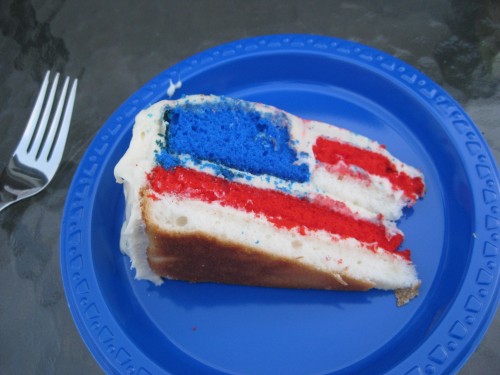
The 4th of July is one of my favorite holidays, and I will use any holiday as an excuse to make dorky novelty desserts designed to appeal to a 10-year-old (see also: gingerbread houses).  So when I saw this brilliant cake design I knew I had to give it a try.

It’s not very much harder than a normal layer cake but it is really impressive looking and so much fun when you’re cutting the first slice with bated breath, wondering if a flag is actually going to appear.

Colored sugar on top helps hide my third-grader-esque frosting job

I used Dorie Greenspan’s Perfect Party Cake recipe like Jayme from Delectable Deliciousness did, and made the cream cheese frosting from the original post at 17 and Baking.  I slightly overbaked some of the cake layers, but the cake was still so good that I didn’t mind it interfering with the cream cheese frosting (at least, not too much.)

Some tips based on my experience:

  • Gel food coloring is the only way to go for bright vibrant colors, even if it does stain under your fingernails
  • A pyrex custard cup was the perfect size (around 4″ in diameter) for the template for cutting out the center
  • As you can see, the blue layer tends to tip towards the outside of the cake.  I’m thinking it might work better to do the blue as an inner circle, instead of an outer ring.
  • Make sure to account for the frosting between the inner circle red and white stripes when you are planning the height of the blue layer.  My red and white layers were half an inch high, so I made the blue layer just shy of 1.25″ and it turned out about perfect.

Read Full Post »

Wheat berry salad with butternut squash, hazelnuts, red onion and arugula

I realized a few things about myself when I organized my pantry several weeks ago.  First, I can’t stop buying coconut milk.  You would think 6 cans would be enough, but apparently it is not.  I also seem to be a lot more adventurous in the grocery store than I am once I’m actually in the kitchen.  My shelves are full of unusual ingredients like millet or dried adzuki beans that I’m ashamed to say I’ve never even used.  I have all these lofty ambitions of trying new and exotic recipes when I’m shopping, but on a time-crunched weeknight it always ends up being easier to go with an old standby.

Case in point: wheat berries.  These had languished neglected in the cupboard for months.  Luckily I had just the recipe in mind to try them out, and as a bonus got to incorporate another aspirational pantry item: the hazelnuts that never quite managed to get turned into cookies last Christmas.

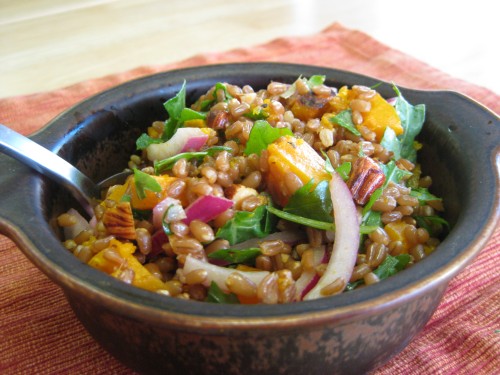
The salad was absolutely addictive and delicious, and the leftovers made for a week’s worth of great filling and healthy lunches.  I loved the chewiness of the wheat berries combined with the crunch of the toasted hazelnuts.  It’s the perfect example of how something composed of simple whole foods can still have you sneaking bites with a spoon straight from the fridge.

Butternut Squash, Wheat Berry and Hazelnut Salad

Adapted from David Lebovitz

Makes approximately 8 cups

1 1/2 cup wheat berries
One bay leaf
One medium sized butternut squash, peeled and cut into small cubes
Half a large red onion, thinly sliced
~1/4 cup red wine vinegar
3 tablespoons olive oil
1 T. dried sage
1 cup whole hazelnuts
1 cup baby arugula, roughly chopped
Salt and pepper

1. Preheat the oven to 425ºF.

2. Thinly slice the red onion and combine in a small bowl with the red wine vinegar and a pinch of salt.  This will lightly pickle the onion and tame the sharp onion flavor a bit.  Set aside while preparing the other components.
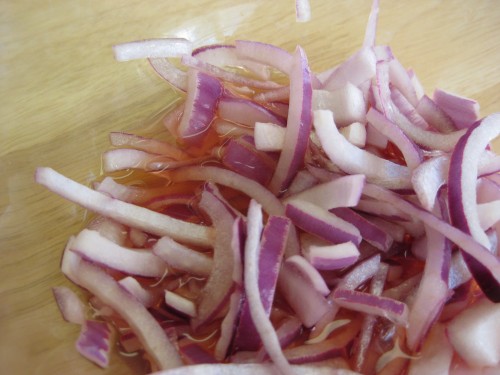
Red onions soaking in red wine vinegar

Red onions soaking in red wine vinegar

3. Chop the hazelnuts, and toast them in a skillet over medium-low heat until they are fragrant and starting to brown.  I think hazelnuts are probably better with the skins removed (they are slightly bitter) but I am lazy and I didn’t mind them.  Transfer the toasted nuts to a bowl and set aside.

Chopped hazelnuts

Chopped hazelnuts

4. Bring about 2 quarts of salted water to a boil, then add the wheat berries and bay leaf. Cook until tender, but still a little chewy.  Mine took around 45 minutes to get there, but could probably have cooked longer as my sore jaw can attest.

5. While the wheat berries are cooking, toss the diced squash on a baking sheet with 1 tablespoon of olive oil, the sage, and some salt and pepper.

Diced butternut squash, seasoned and ready for baking

Diced butternut squash, seasoned and ready for baking

6. Roast the squash, stirring halfway through baking, for about 15 minutes total.  The cubes should be tender when poked with a fork and browned on the outside but still firm enough to hold their shape in the salad (mine were on the overly mushy side).

7. Once the wheat berries are cooked, drain them and remove the bay leaf. Transfer the wheat berries to a bowl and mix in 2 tablespoons of olive oil and the toasted nuts.

8. Stir in the roasted butternut squash, the red onions and the chopped baby arugula.  Taste the salad and add some of the vinegar that the onions were soaking in if it needs a little more acidity.

There are so many ways this basic formula could be adapted, see the original post from David Lebovitz for more great ideas.

Read Full Post »